How to Authenticate React Application using Supabase Auth


Authentication plays a crucial role in many web applications. Using it, users can create accounts, log in, and access protected resources securely. When developing an application from scratch, user authentication can be complex and time-consuming. This article discusses how to implement user authentication in React applications using Supabase
How to Create a New Project in the Supabase Developer Console
In Supabase Developer Console, you can create new projects by following these steps:
i) Set up a Supabase developer account. On the dashboard, click the new project button to begin a new project.Click on Create new project after entering a name for the project, choosing a region, and entering a password (optional but recommended when setting up a database).

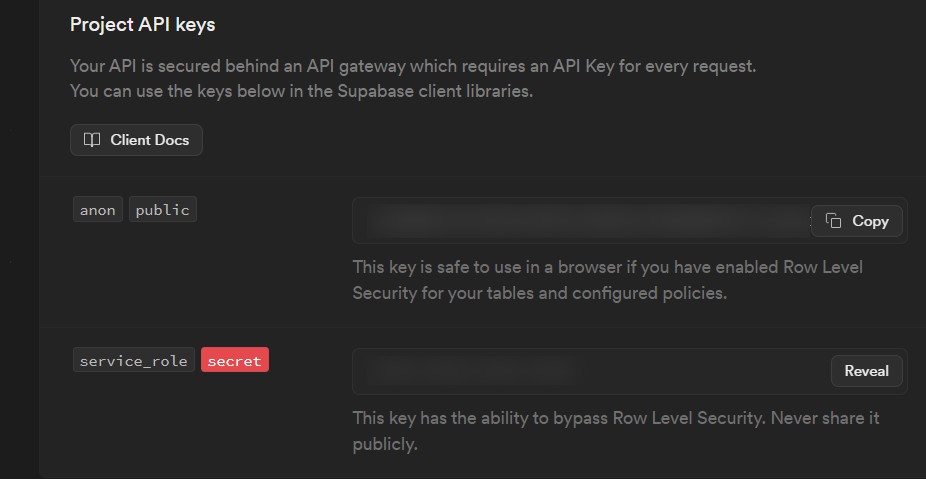
ii) Copy the project URL and the public anon key from API Settings.
How to configure Supabase Authentication Service for a React.js application
Start by creating an application in React.js and then open the project folder in your favorite code editor. You'll need to create an ENV file in the root directory of your project folder to hold the environment variables: your project URL and your public anonymizer key. Visit your Supabase settings page, open the API section, and copy your project URL and public anon key.
REACT_APPLICATION_SUPABASE_URL= your_project URL
REACT_APPLICATION_SUPABASE_API_KEY = your_public_anon_key
1. Get the required packages
You can install the dependencies by running this command:
npm install @supabase/auth-ui-react @supabase/supabase-js react react-router-dom2. Creating the components for the login page and the success page
Make a folder called pages in your React.js application's /src directory. Create two files inside this folder: Login.js and Success.js.
3. Component for login pages
By utilizing the React.js Authentication UI provided by Supabase, this component will render signup and sign-in features. The authentication UI was imported as a dependency (@supabase/auth-UI-react), so implementing it was easier.
Add the following code to login.js:
// src/pages/Login.js
import React from 'react';
import {createClient} from '@supabase/supabase-js';
import {Auth} from '@supabase/auth-ui-react';
import { ThemeSupa } from "@supabase/auth-ui-shared";
import {useNavigate} from 'react-router-dom';
const supabase = createClient(
    process.env.REACT_APPLICATION_SUPABASE_URL,
    process.env.REACT_APPLICATION_SUPABASE_API_KEY
);
function Login() {
    const navigate = useNavigate();
    supabase.auth.onAuthStateChange(async (event) =>{
        if (event !== "SIGNED_OUT") {
            navigate('/success');
        }else{
            navigate('/login');
        }
    })
  return (
    <div className="App">
      <header className="App-header">
        <Auth
            supabaseClient={supabase}
            appearance={{theme: ThemeSupa}}
            theme="dark"
            providers={['google', 'facebook, 'github']}
        />
      </header>
    </div>
  );
}
export default Login;
Code Explanation:
Use the environment variables in the ENV file to initialize your Supabase client. By setting up a listener for the onAuthStateChange() method of supabase.auth, you will be able to track changes in the authentication state, e.g., When the authentication state is "SIGNED_OUT," the user is navigated to the '/success' page, otherwise, the user is navigated to the '/login' page. In order to manage this process, you will use the navigate method provided by the useNavigate hook. The final step is to return a div containing all the properties and properties of the React Auth UI component from the Supabase library, with an appearance of themeSupa (provided by Supabase), dark theme and Google provider.
4. Component for success pages
When a user is successfully authenticated, this component renders a success page with the user's details and a sign-out button.
In the Success.js file, add the code below:
// src/pages/Success.js
import React from 'react';
import {createClient} from '@supabase/supabase-js';
import {useNavigate} from 'react-router-dom';
import {useEffect, useState} from 'react';
const supabase = createClient(
    process.env.REACT_APPLICATION_SUPABASE_URL,
    process.env.REACT_APPLICATION_SUPABASE_API_KEY
);
function Success() {
    const [user, setUser] = useState([]);
    const navigate = useNavigate();
    useEffect (() => {
        async function getUserData(){
           await supabase.auth.getUser().then((value) => {
               if(value.data?.user) {
                setUser(value.data.user)}
            }) }
       getUserData();
    },[]);
    const avatar = user?.user_metadata?.avatar_url;
    const userName = user?.user_metadata?.full_name;
    async function signOutUser(){
        await supabase.auth.signOut();
         navigate('/login');
     };
  return (
    <div className="App">
      <header className="App-header">
      <h1>Login Successful</h1>
       <h2>{userName}</h2>
       <img src={avatar} />
       <button onClick={()=> signOutUser()}>Sign Out</button>
      </header>
    </div>
  );
}
export default Success;
Code Explanation
In your ENV file, put your project URL and public anon key to initialize a Supabase client. Using the React.js hooks useState and useEffect, you can get data from an API response. Using the useEffect hook, you can call the supabase auth.getUser method asynchronously. Using this method, you can retrieve user information associated with the current session. When the user data exists, the asynchronous function sets it to the state variable. When a user clicks on the sign-out button, the signOutUser function uses the supabase auth.signOut method to sign them out. Finally, return a div containing some information about the user.
5. Set up the page routes
The final step is configuring the login and success page routes.
In the app.js file, add the code below:
// app.js
import React from 'react';
import { BrowserRouter as Router, Routes, Route } from 'react-router-dom';
import Login from './pages/Login';
import Success from './pages/Success';
function App() {
  return (
    <Router>
      <Routes> //Define the routes
        <Route path="/login" element={<Login />} />
        <Route path="/success" element={<Success />} />
      </Routes>
    </Router>
  );
}
export default App;
Code Explanation
Using the react-router library, define two routes: one for the login page and one for the success page. The route paths should be set to '/login' and '/success', with the Login and Success components assigned to the appropriate routes.
How to Set up Google Auth Configuration
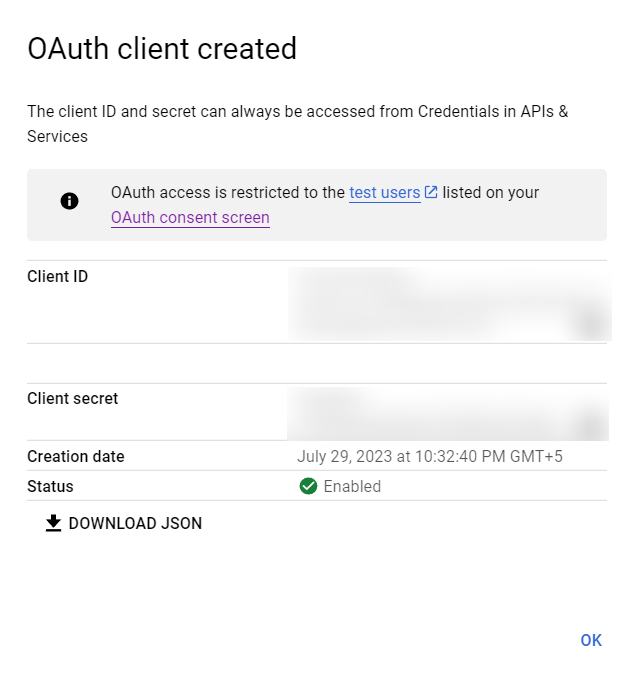
The first step in authenticating with Google is to register your app on the Google Developer Console (GDC) and obtain a ClientID and ClientSecret. Here are the steps you need to follow to set up a project on GDC:
i) Sign in to the Google Developer Console using your Google account.
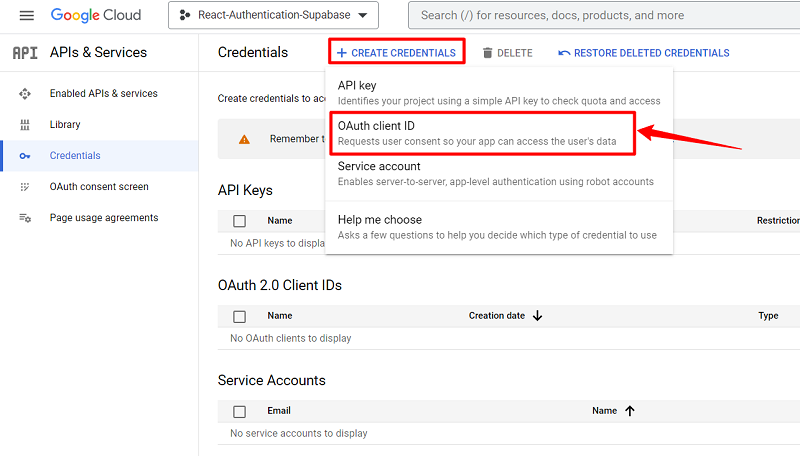
ii) Upon logging in, Create a project (React-Authentication-Supabase) and Select APIs and Services, then Choose Credentials, then select the OAuth client ID option.
iii) Select the type of application from the options provided, and then enter the application's name.
iv) In the next step, specify the home route URL for your application (http:///:localhost:3000), and then specify the callback redirect URL. You can paste the redirect URL you copied from the settings page of the Google Provider for Supabase. To complete the process, click on Save.
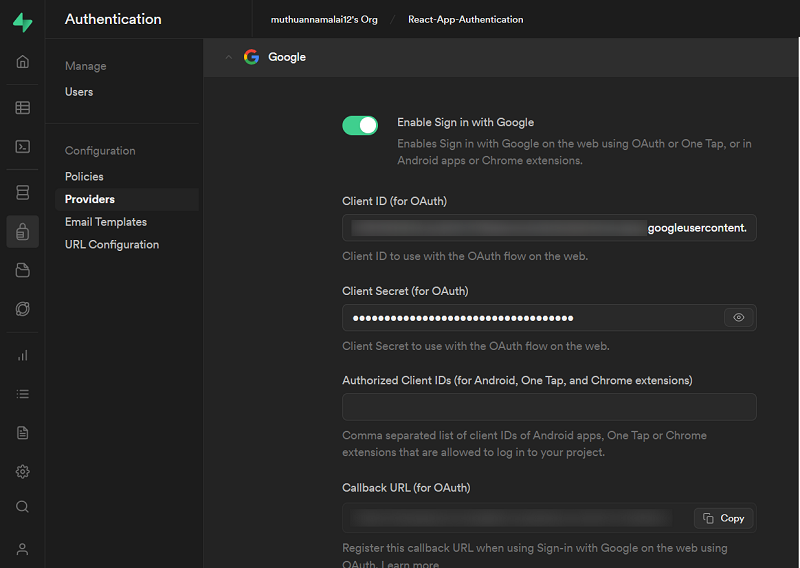
v) In Supabase, click Authentication on the left side, then click Providers. Then, I'll select Google, enable it, and enter the client ID and secret we just got
How to Set up Facebook Auth Configuration
i) In order to authenticate our app with Facebook, we must register as a Facebook Developer App. To register, you must log in with your existing Facebook account at https://developers.facebook.com/apps/. You will be prompted to enter your email address or mobile number if you have not logged in to Facebook.
ii) Upon registering at Facebook Developer Apps, you will automatically be redirected to https://developers.facebook.com and must click "Log in."
iii) In the Primary Email field, enter an email address that is not your Facebook account email address
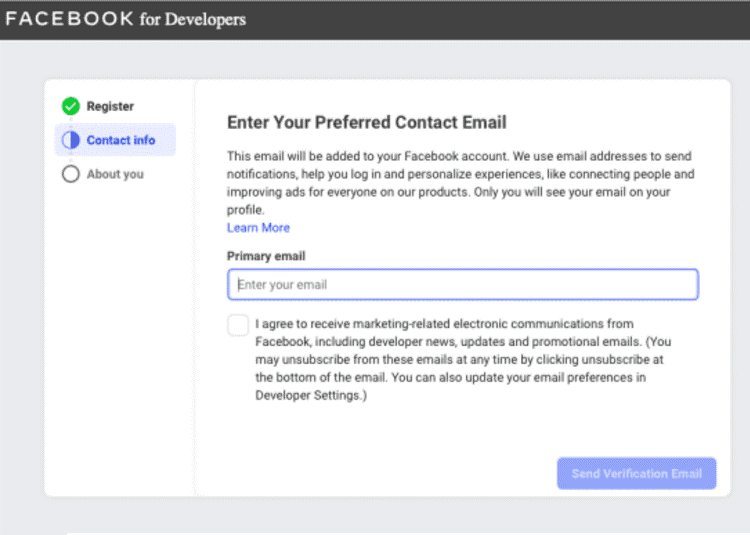
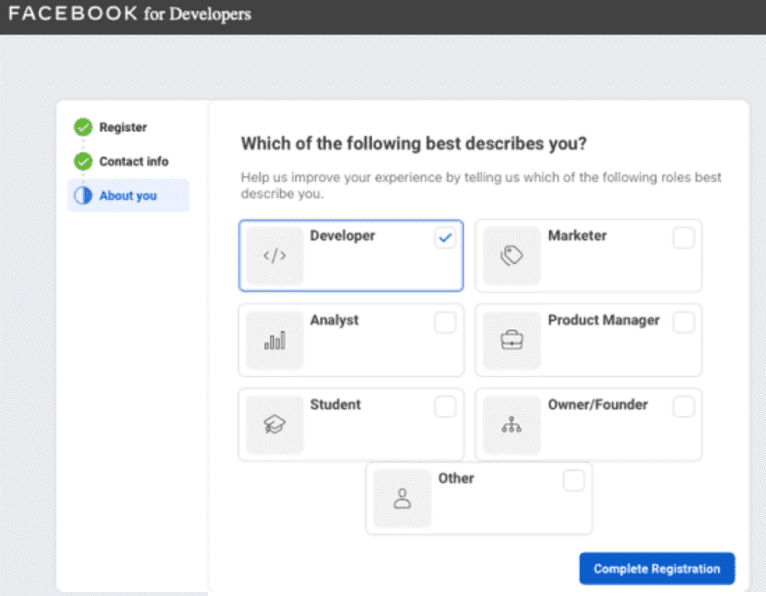
iv) Select "Developer" and click "Complete and Register"
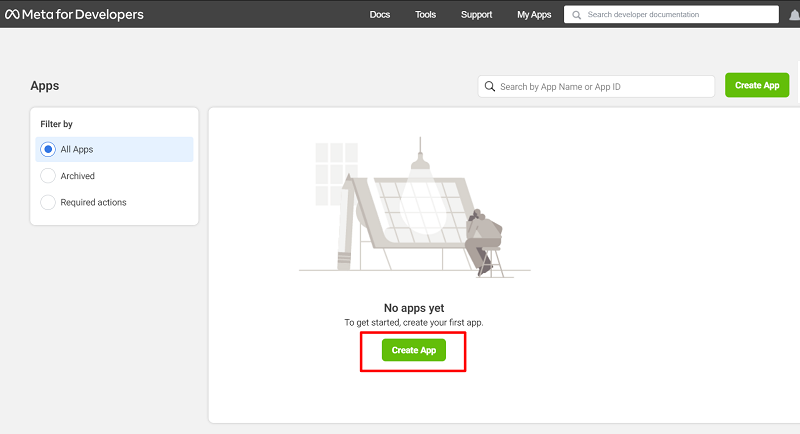
v) Now, Facebook will redirect us to the Developer dashboard. In Facebook Developer Dashboard, click "Create App" to create your app.
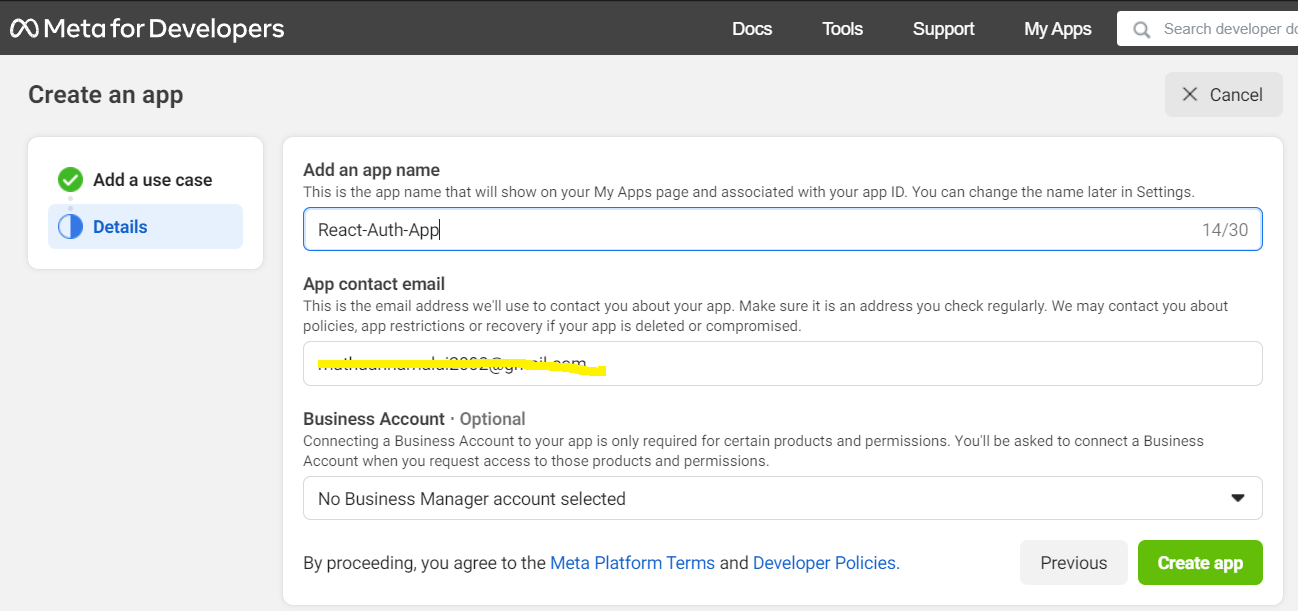
v) Fill out the App Display Name field with what you would like to name this app, and enter your previously registered email address. In this tutorial, we will use the name "React-Auth-App". Then click "Create App".
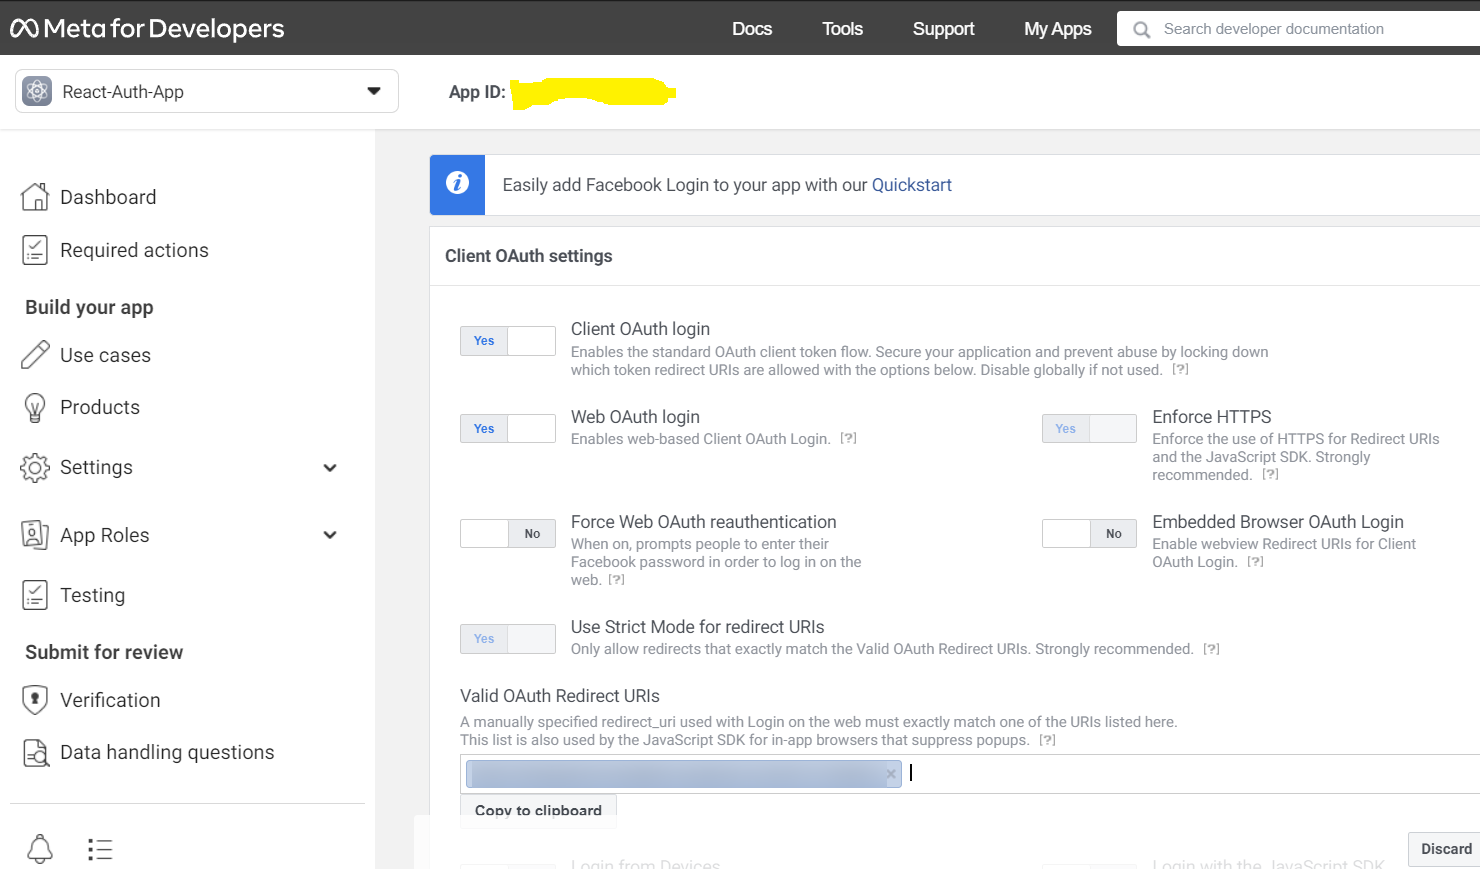
vi) Select the Products section.
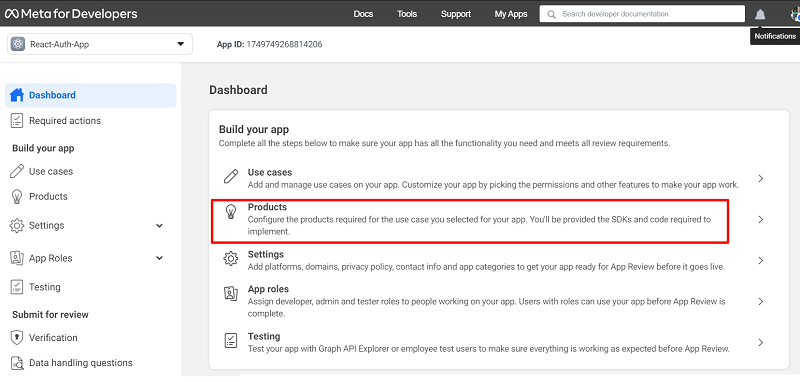
vii) The redirect URL is pasted under Valid OAuth Redirect URIs.
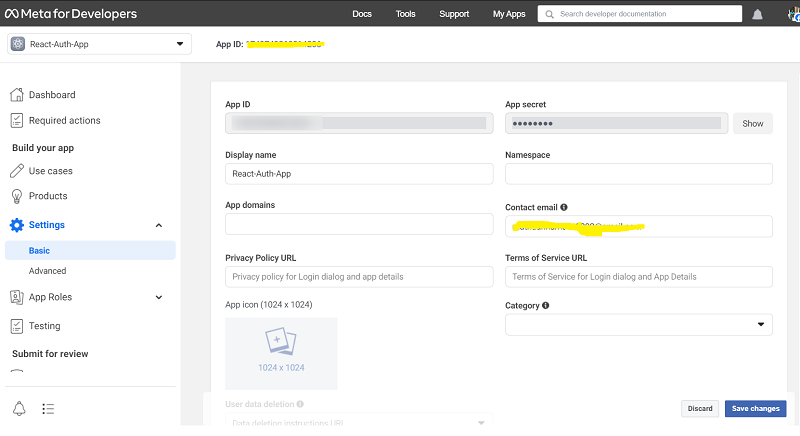
viii) To access basic settings, click the Settings section on the left sidebar. In this step, we will copy our App ID and App secret:
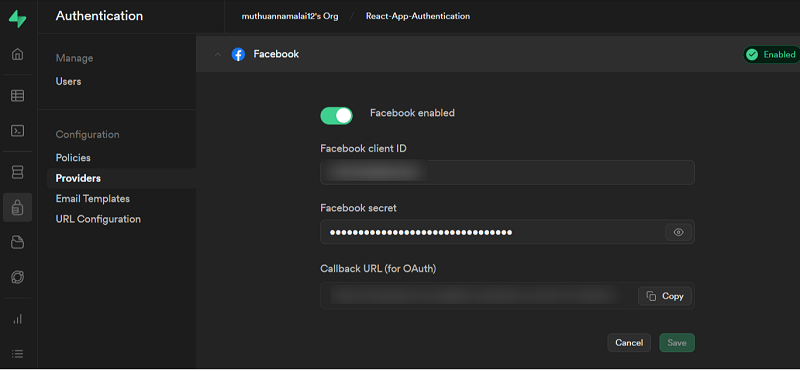
ix) From here, we know what to do. Enter your Facebook credentials into the Providers section in Supabase, then enable Facebook in your Auth section. By adding this final touch, we'll also be able to log into our app using Facebook.
How to Set up GitHub Auth Configuration
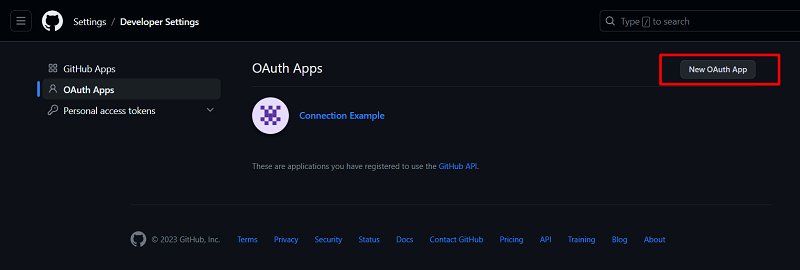
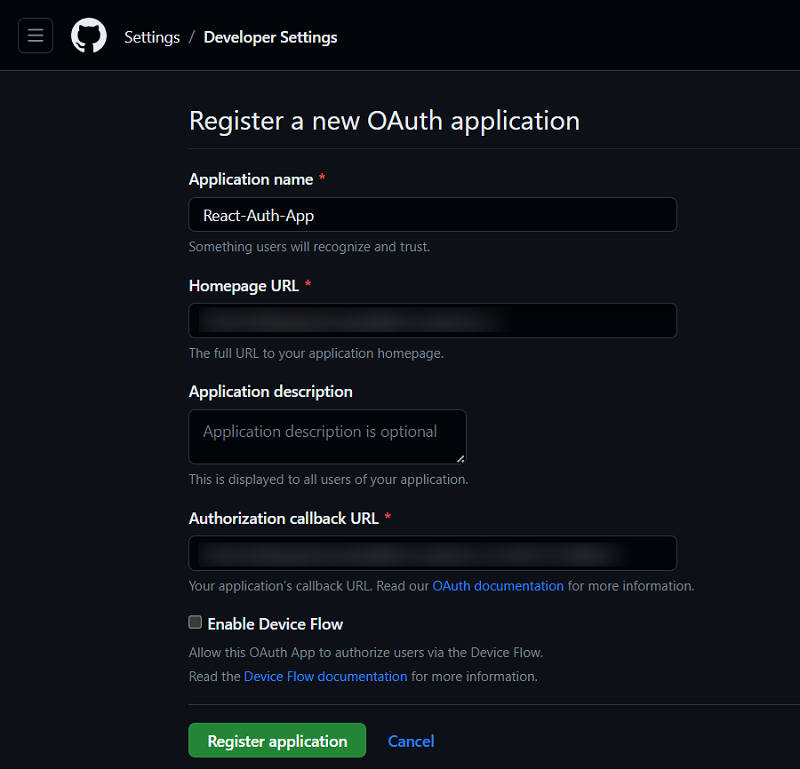
i) Go to https://github.com/settings/developers to create an new OAuth application.
ii) Get the homepage and get the redirect the URL from the supabase dashboard and paste it here
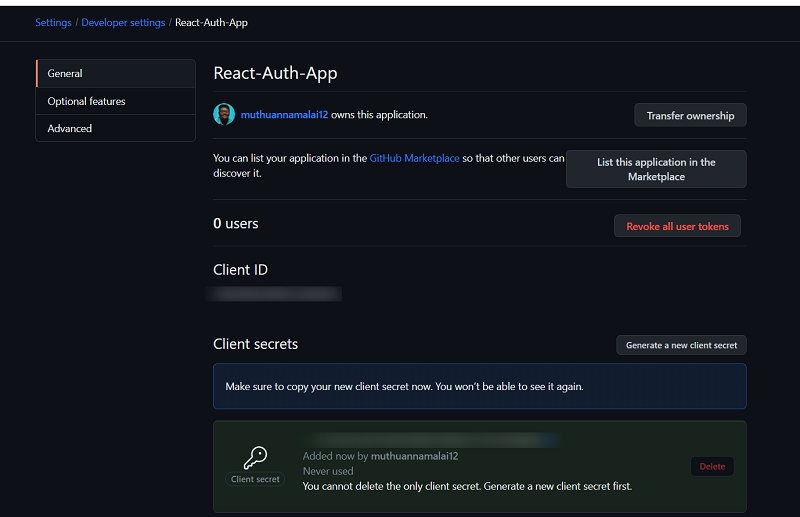
iii) After that, go into the application and create a new client secret.
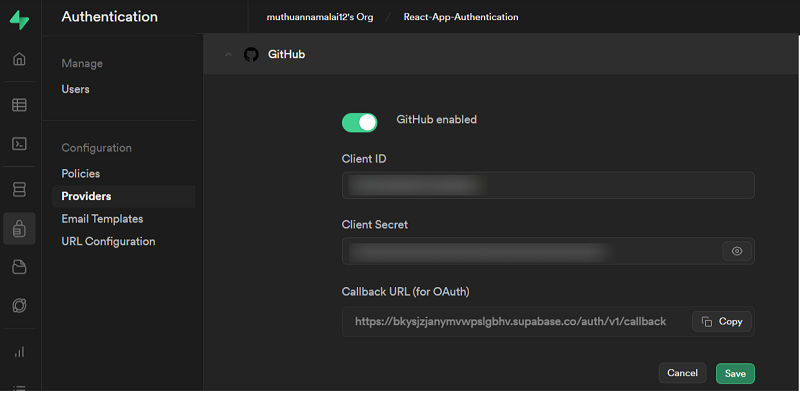
iv) By adding the credentials to our providers, we should also be able to access our app through GitHub:
Now we have setup and configured all providers. Lets run the app and see how authentication works.
For the development server to be spun up, run the following command on your terminal:
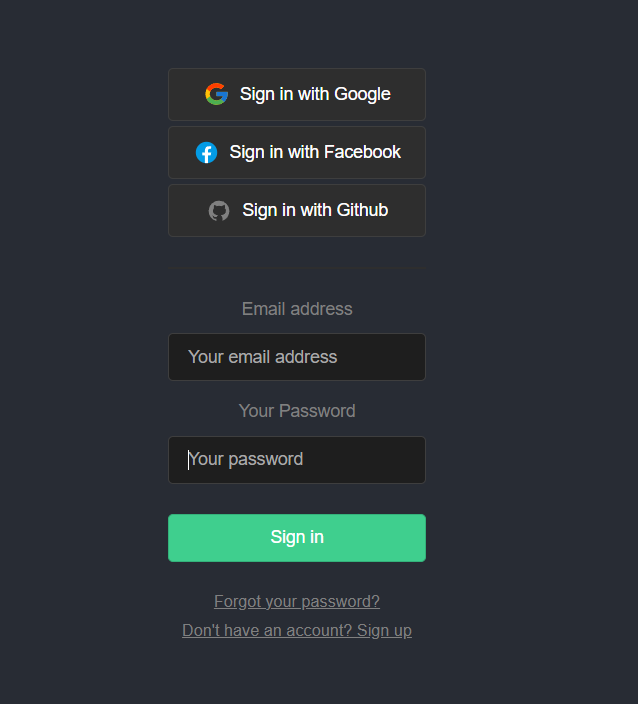
npm startVisit http:///:localhost:3000 on your browser to see the results. Through the login component, you can log in through your email address, Google, Facebook, Github, and Facebook accounts like below
When the user is signed in we will get a success page like below. User name and Avatar retrieved from social auth provider will be displayed.

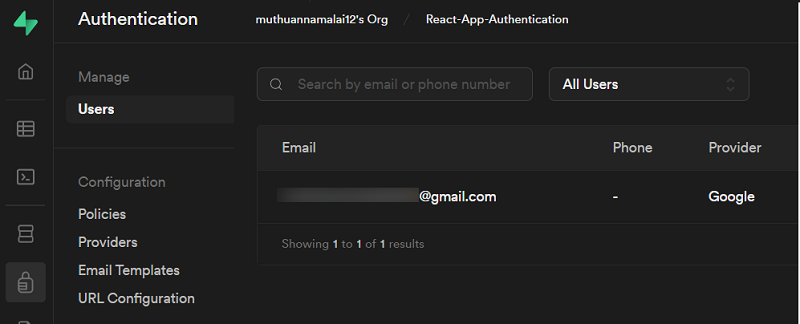
Data of users who register with a social network or with an email address and password is stored in Supabase's Auth database. Supabase validates the details against the credentials used to sign up when they sign in with their credentials.
Conclusion:
Overall, Supabase provides a simple and secure solution for adding user authentication to React Applications. With Supabase, developers can quickly implement user authentication and other backend functionalities without needing to manage servers or infrastructure.
Source code available in Github