Building Real-time Video Calling with WebRTC and Node.js

In the age of digital communication, real-time video calling has become an essential part of our lives. Whether it's for remote work, connecting with loved ones, or collaborating with peers, the demand for seamless video calling applications continues to grow. One of the most powerful tools for achieving this is WebRTC (Web Real-Time Communication), a technology that enables real-time communication in web browsers and mobile applications. In this article, we'll explore how to implement WebRTC for video calling using Node.js and Express.js to build a robust application. We'll provide detailed code examples to help you get started.
What is WebRTC?
WebRTC is an open-source project that empowers developers to create real-time communication applications for the web. It provides a set of APIs and protocols that allow for peer-to-peer audio, video, and data sharing between web browsers and mobile devices. WebRTC eliminates the need for plugins or third-party software, making it an excellent choice for building video calling applications that work directly in modern web browsers.
What is Peer To Peer Connections?
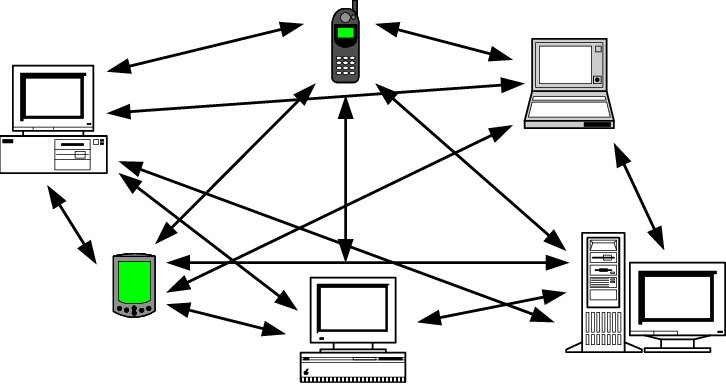
A peer-to-peer (P2P) connection is a decentralized network arrangement where devices (peers) communicate directly with each other without the need for a central server or intermediary. P2P connections enable efficient data sharing and real-time communication, making them ideal for applications like file sharing, video calling, and decentralized networks. This direct interaction between peers can enhance privacy, reduce latency, and distribute network load, making P2P technology valuable in various domains, including distributed systems and peer-to-peer file sharing networks.
Look at the picture below for a more clear understanding of peer to peer connection:
Prerequisites
Before we dive into building our WebRTC video calling application, make sure you have the following prerequisites installed on your development machine:
Node.js: Download and install Node.js from the official website.
npm (Node Package Manager): npm comes bundled with Node.js. You can check its version by running npm -v in your terminal.
Basic knowledge of JavaScript and Node.js.
Setting Up the Project
Let's start by creating a new Node.js project and setting up the necessary dependencies. Open your terminal and follow these steps:
Create a new project folder and navigate into it:
mkdir webrtc-video-call

cd webrtc-video-call
Initialize a new Node.js project:
npm init -y
Install the required dependencies:
npm install express socket.io uuid ejs
We also need to install peerjs globally by using the command:
npm i -g peer
Understanding the Server-Side Code (server.js)
Let's first examine the server-side code responsible for setting up the application's backend.
const express = require('express')

const app = express()

const server = require('http').Server(app)

const io = require('socket.io')(server)

const { v4: uuidV4 } = require('uuid')

app.set('view engine', 'ejs')

app.use(express.static('public'))

// Handling Routes

app.get('/', (req, res) => {

  res.redirect(`/${uuidV4()}`)

})


app.get('/:room', (req, res) => {

  res.render('room', { roomId: req.params.room })

})


// WebSocket Communication

io.on('connection', socket => {

  socket.on('join-room', (roomId, userId) => {

    socket.join(roomId)

    socket.to(roomId).broadcast.emit('user-connected', userId)

    socket.on('disconnect', () => {

      socket.to(roomId).broadcast.emit('user-disconnected', userId)

    })

  })

})

// Starting the Server
server.listen(3000)
Server Setup:
This code initializes an Express.js server and configures it to use Socket.io for real-time communication. It also incorporates the 'uuid' library to generate unique room IDs.
Handling Routes:
The application handles two routes:
'/': Redirects users to a randomly generated room ID.
('/:room'): Renders the 'room.ejs' template with the room ID as a parameter.
WebSocket Communication:
This is the heart of the application. When a user connects, they join a room identified by the room ID. The server broadcasts a 'user-connected' event to notify all other users in the same room about the new connection. When a user disconnects, a 'user-disconnected' event is broadcast to inform others.
Starting the Server: The server starts listening on port 3000.
Understanding the Client-Side Code (public/script.js)
const socket = io('/')

const videoGrid = document.getElementById('video-grid')

const myPeer = new Peer(undefined, {

  host: '/',

  port: '3001'

})

const myVideo = document.createElement('video')

myVideo.muted = true

const peers = {}

navigator.mediaDevices.getUserMedia({

  video: true,

  audio: true

}).then(stream => {

  addVideoStream(myVideo, stream)

  myPeer.on('call', call => {

    call.answer(stream)

    const video = document.createElement('video')

    call.on('stream', userVideoStream => {

      addVideoStream(video, userVideoStream)

    })

  })

  socket.on('user-connected', userId => {

    connectToNewUser(userId, stream)

  })

})


socket.on('user-disconnected', userId => {

  if (peers[userId]) peers[userId].close()

})


myPeer.on('open', id => {

  socket.emit('join-room', ROOM_ID, id)

})


function connectToNewUser(userId, stream) {

  const call = myPeer.call(userId, stream)

  const video = document.createElement('video')

  call.on('stream', userVideoStream => {

    addVideoStream(video, userVideoStream)

  })

  call.on('close', () => {

    video.remove()

  })

  peers[userId] = call

}


function addVideoStream(video, stream) {

  video.srcObject = stream

  video.addEventListener('loadedmetadata', () => {

    video.play()

  })

  videoGrid.append(video)

}
Socket.io Initialization: socket initializes a WebSocket connection to the server for real-time communication.
HTML Element Selection: videoGrid represents the HTML element where video streams will be displayed.
PeerJS Initialization: myPeer is initialized with PeerJS to handle WebRTC connections. It specifies the host and port where the PeerJS server is running.
User Video Element: myVideo is a dynamically created video element for the user's own video stream. It's set to muted to prevent audio feedback.
Peers Object: peers stores references to connected peers.
Capturing User Media: navigator.mediaDevices.getUserMedia() captures the user's camera and microphone, creating a video stream. It then calls the addVideoStream function to display the user's own video on the page.
Call Handling: myPeer.on('call', call => { ... }) listens for incoming calls. When a call is received, it answers the call, creates a new video element for the remote user's video stream, and adds the remote video to the page.
User Connection Handling: socket.on('user-connected', userId => { ... }) listens for new user connections and calls the connectToNewUser function to establish a connection with them and display their video.
User Disconnection Handling: socket.on('user-disconnected', userId => { ... }) listens for user disconnections and closes the connection to that user if it exists.
PeerJS Open Event: myPeer.on('open', id => { ... }) handles when a new user successfully opens a connection with PeerJS. It emits a 'join-room' event to the server, including the room ID and user's ID.
Connecting to New Users: connectToNewUser establishes a connection with a new user and adds their video stream to the page.
Adding Video Streams: addVideoStream sets the video stream as the source for a video element, plays the video, and appends it to the videoGrid.
Starting the Server: The server starts listening on port 3001, to start the peer server you need to open a new terminal and use the command peerjs --port 3001
Exploring the (room.ejs) HTML Template: Creating the WebRTC Video Calling Interface
<!DOCTYPE html>

<html lang="en">

<head>

  <meta charset="UTF-8">

  <meta name="viewport" content="width=device-width, initial-scale=1.0">

  <meta http-equiv="X-UA-Compatible" content="ie=edge">

  <script>

    const ROOM_ID = "<%= roomId %>"

  </script>

  <script defer src="https://unpkg.com/peerjs@1.2.0/dist/peerjs.min.js"></script>

  <script src="/socket.io/socket.io.js" defer></script>

  <script src="script.js" defer></script>

  <title>WebRTC Video Chat</title>

  <style>

    #video-grid {

      display: grid;

      grid-template-columns: repeat(auto-fill, 300px);

      grid-auto-rows: 300px;

    }


    video {

      width: 100%;

      height: 100%;

      object-fit: cover;

    }

  </style>

</head>

<body>

  <div id="video-grid"></div>

</body>

</html>
This HTML template (room.ejs) sets up the structure of the video calling page and includes scripts for WebRTC and Socket.io. Below is an explanation of its key components:
<script> with ROOM_ID: This script initializes a JavaScript variable ROOM_ID with the room ID provided by the server using EJS template rendering (<%= roomId %>).
<script> tags for dependencies: These script tags load the necessary JavaScript libraries:
peerjs.min.js: The PeerJS library for WebRTC.
socket.io.js: The Socket.io library for WebSocket communication.
script.js: The client-side JavaScript file for handling WebRTC video calls.
<title>: Sets the title of the web page.
CSS Styles: Defines CSS styles for the video grid and video elements to control their layout and appearance.
<div id="video-grid">: This <div> element is where video streams will be displayed.
The room.ejs file is an essential part of the application as it provides the structure and client-side scripts necessary for video calling. When a user accesses a room, this template is rendered with the corresponding room ID, allowing them to participate in video calls within that room.
After running the server and running the peer you can enter the videochat using one id, an example of which is shown below:
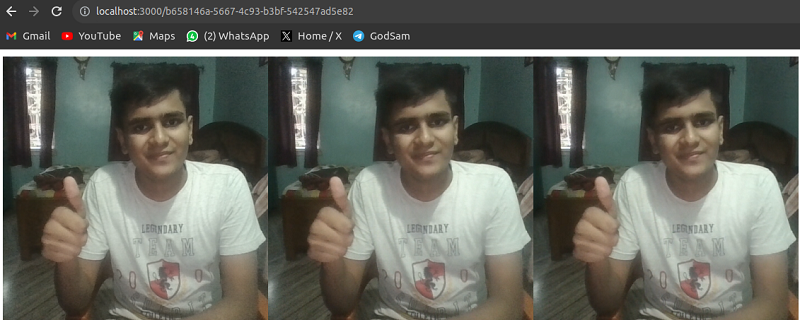
Above I joined thrice using the same id so you can see me thrice.
Conclusion
In this article we learned how to implement real time video calling using webrtc, we learned about peer to peer communication,webrtc,socket.io and a lot of other thing in this article. We created server.js which is our backend server of the application, we used ejs for rendering. This article provides a solid foundation for building your own WebRTC-based video calling application.