JHipster - Generate simple web application code using Spring Boot and Angular


JHipster is one of the full-stack web app development platform to generate, develop and deploy. It provides the front end technologies options of React, Angular, Vue mixed with bootstrap and font awesome icons. Last released version is JHipster 6.0.1. It is licensed under Apache 2 license.
It provides flexibility to choose the front-end, back-end technologies, database, deployment options while generating the project. Also provides on the fly add-on support like Elasticsearch, Websockets.
Installation
Pre-requisites for installation of the tool is Java8, Git, Node.js and yarn. Then install the hipster using the yarn command as below to install the recent JHipster version.
yarn global add generator-jhipster@6.0.1Once installed, check the version as below
  $jhipster --version
    INFO! Using JHipster version installed globally
    6.0.1
Generator JHipster source code is available in Github
Create application
In this article, we will create an application for basic functionality of IT service management with JHipster. The interesting part will be most of the scaffolding code will be generated by JHipster generator with the CRUD operation and can be modified based on the business need.
Create a project directory and start the jhipster app generator as below.
$ mkdir itsmapp
$ cd itsmapp
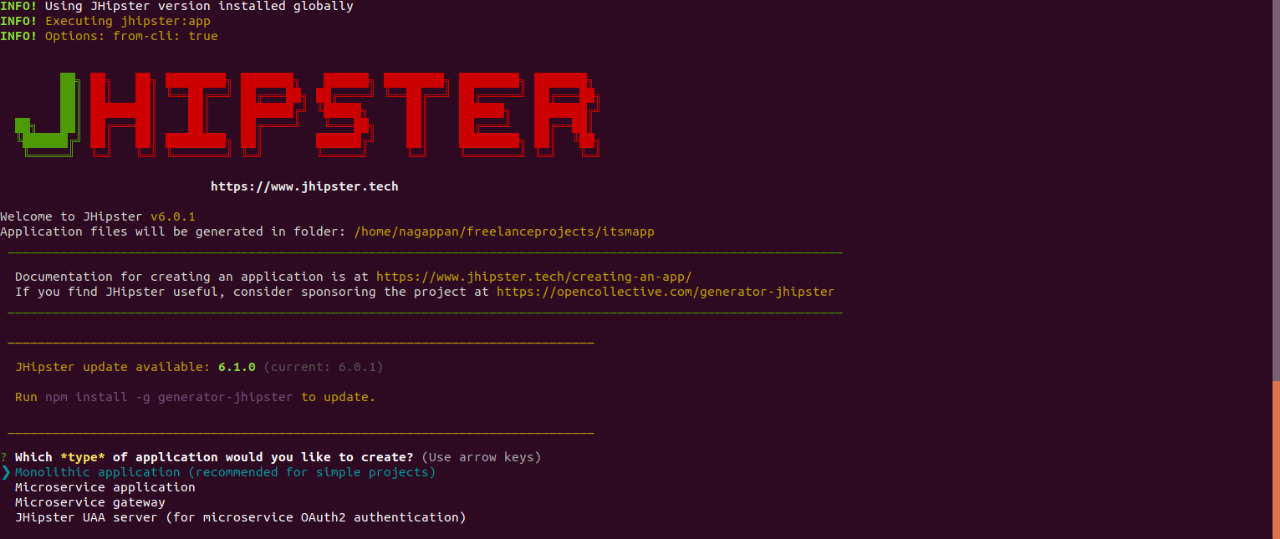
$ jhipster appOnce generator started, lot of successive objective questions will be appearing which can be easily answered. After all the questions, the application will be generated.
In case of any queries regarding answers, please check the below screen-shots for kind of answers to be provided.
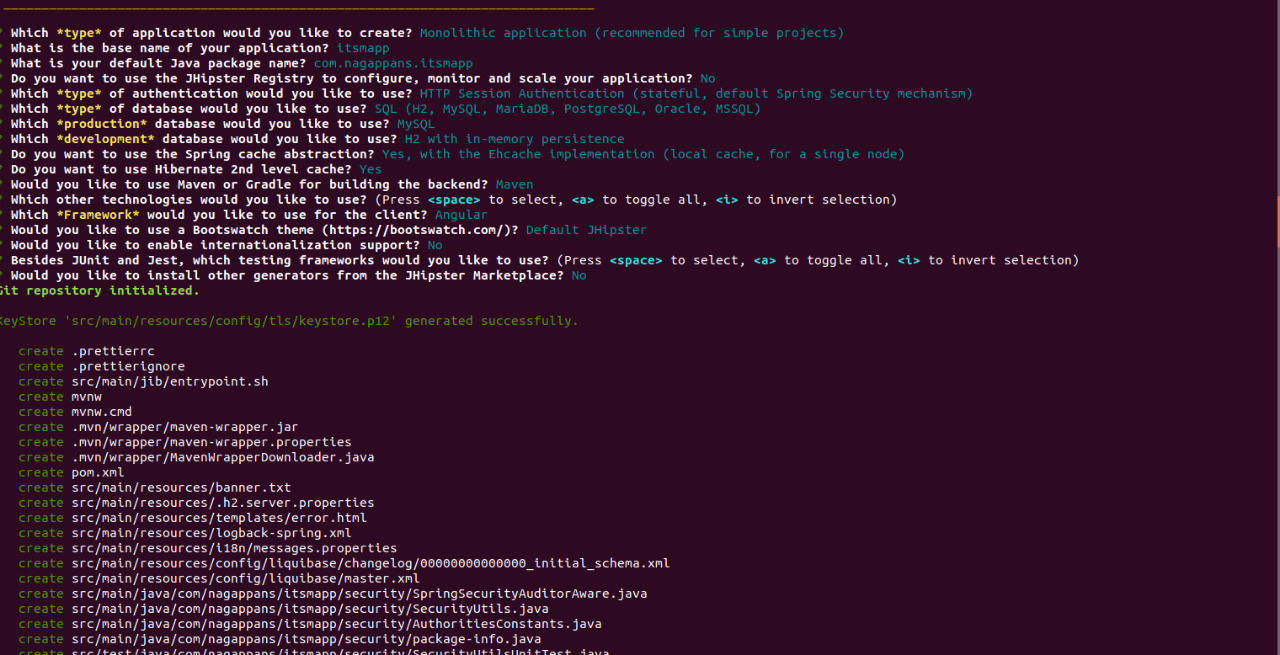
Then it will generate the complete code of having Angular (latest version 7, infact it can be checked with ng version) as front-end and spring boot (latest version 2.1.4) as back-end with database as H2 for development purpose. After successful generation, the below success message will appear.

Now the project directory will be appearing as below command.
itsmapp$ ls
  angular.json mvnw.cmd package.json pom.xml proxy.conf.json sonar-project.properties tsconfig-aot.json tslint.json
  mvnw node_modules package-lock.json postcss.config.js README.md src tsconfig.json webpack

itsmapp$ ./mvnw
While executing the mvnw command, it builds the application and opens the URL for access. Application generally gets started at 8080. If you want to change to some other custom port, locate the file .yo-rc.json in root directory, where the serverPort key has to be changed to custom port ('9090'). Once changed, we need to re-generate the application to change in all location the port, which can be done by "JHipster" in same project location. For the overwrite prompt, just type "a" so it will be replace all the files.
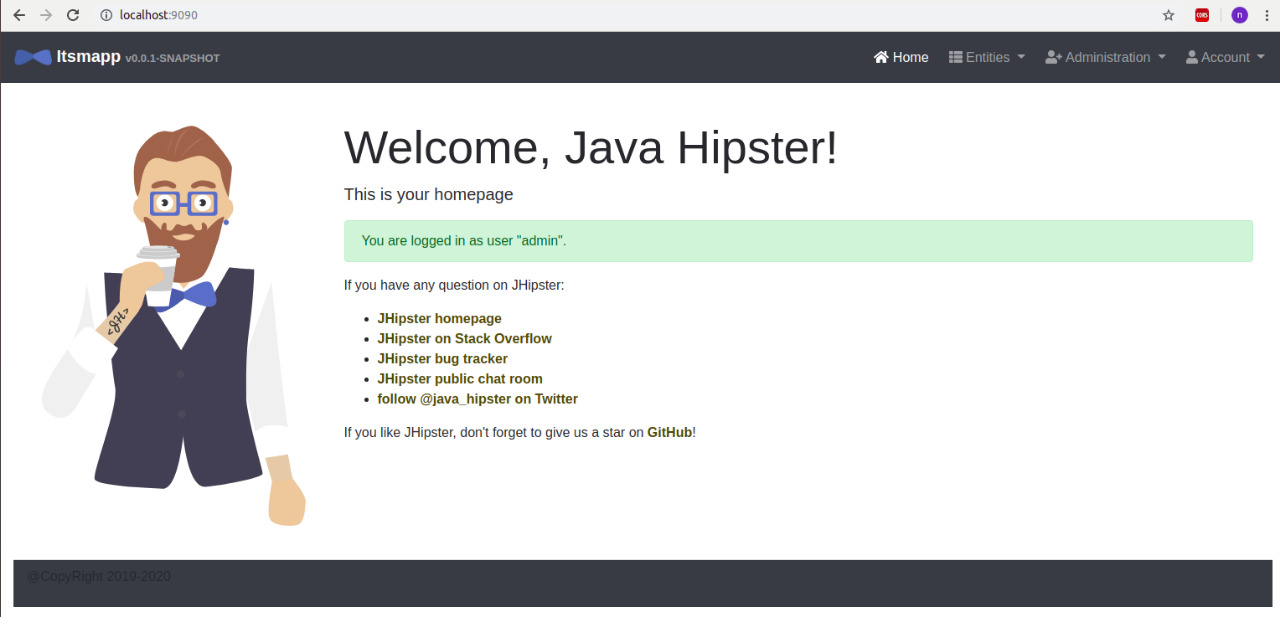
Admin access is required for accessing the whole system, it can be done by entering admin/admin to open the application. In the admin management, we can check the health, open the Swagger to check the back-end APIs and audits for the trace of users logged in.
Now for itsm app, Asset and Service request will be raised and it will be resolved by the IT Team. This workflow can be incorporated into the application easily after developing it from jdl-online design entities. Entities can be designed using JDL (JHispster Domain Language) where we express the entities and relationship between them.
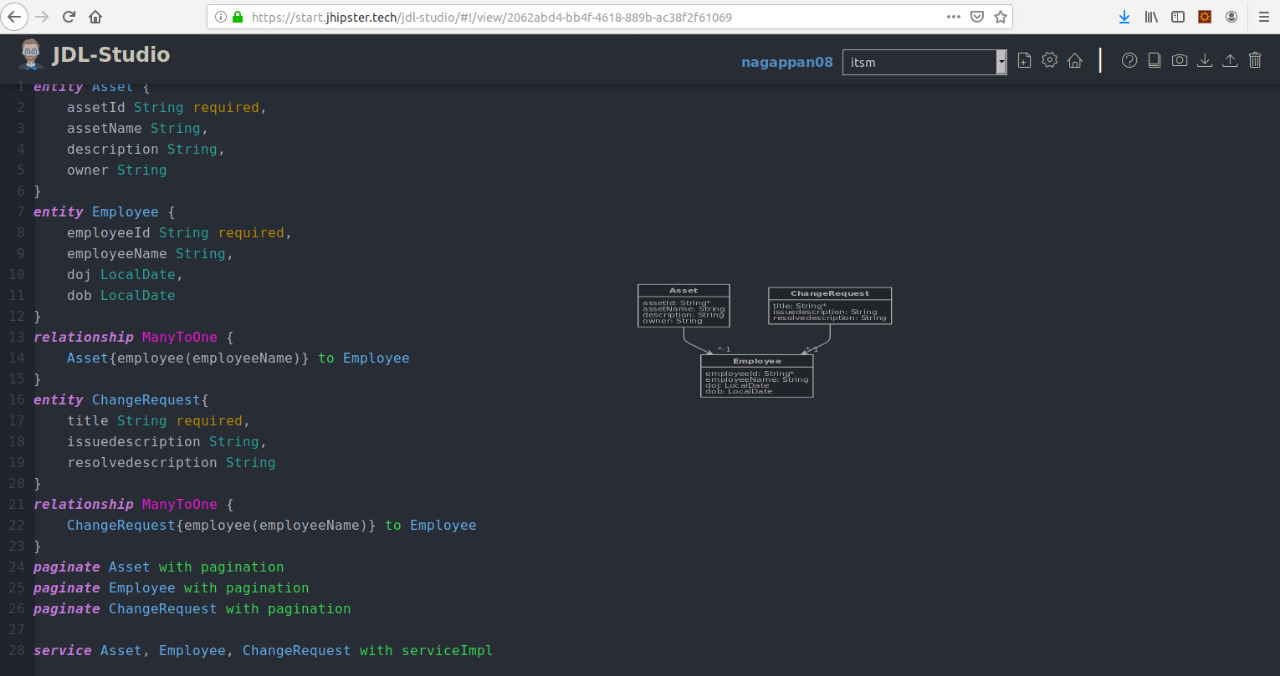
Now importing the JDL into the project, will generate CRUD operation services for entities by maintaining the relationship integrity also. While executing the below command, it will prompt for overwrite the existing files, please enter 'a', so as to replace all the files. General note is to stop server before importing it.
itsmapp$ jhipster import-jdl ~/Downloads/jhipster-jdl.jh
On successful, the following message will appear.
Entity Asset generated successfully.
Entity Employee generated successfully.
Entity Service generated successfully.
Congratulations, JHipster execution is complete!
While generating entities, it will generate the liquibase files for sql changes also. For front-end, it uses webpack to build Angular 7 code. To build the Angular code, key in the command "yarn build". Then start the application by using ./mvnw.
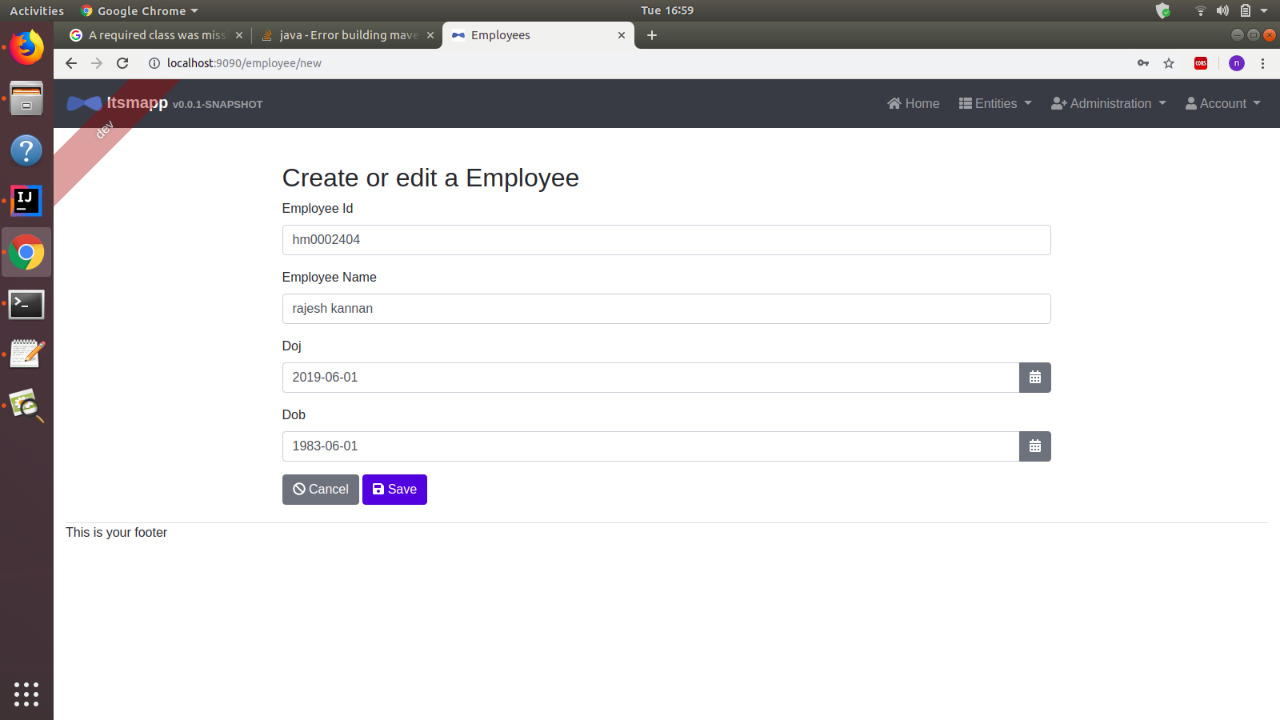
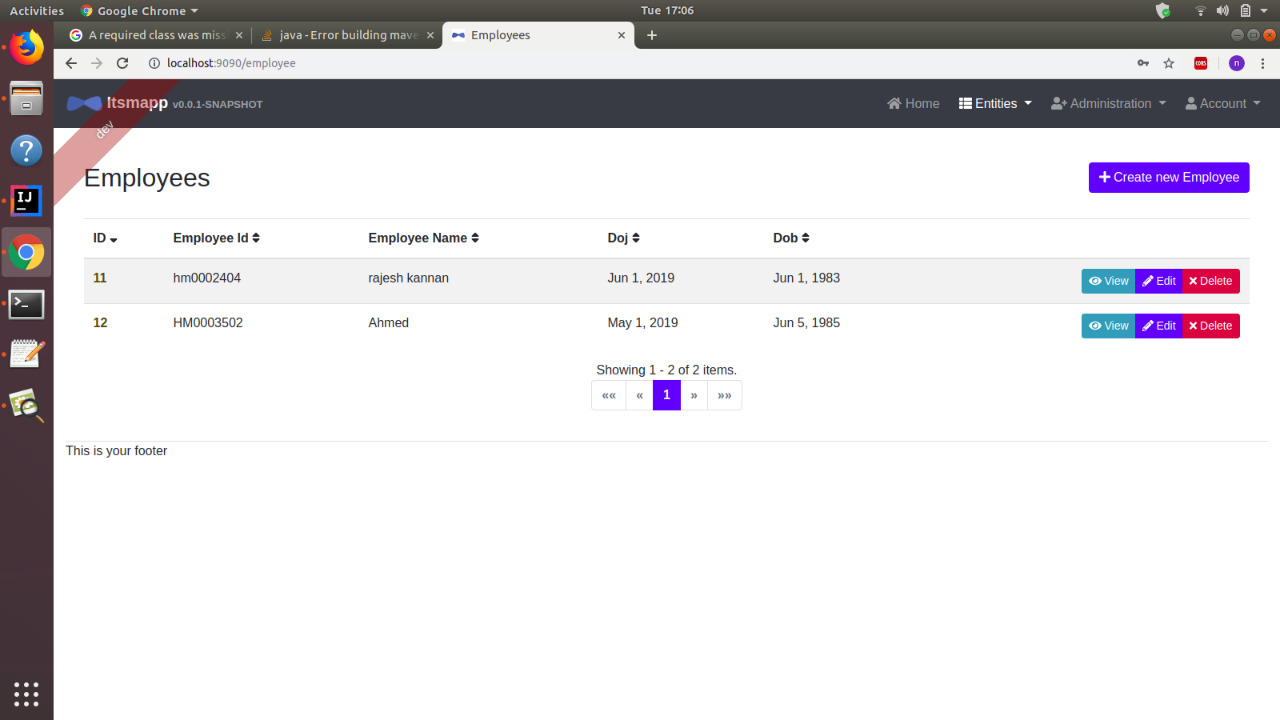
Now under entities, we can see the Employee, Asset and Change request. Now creat two employees one for raising the request and another to resolve.
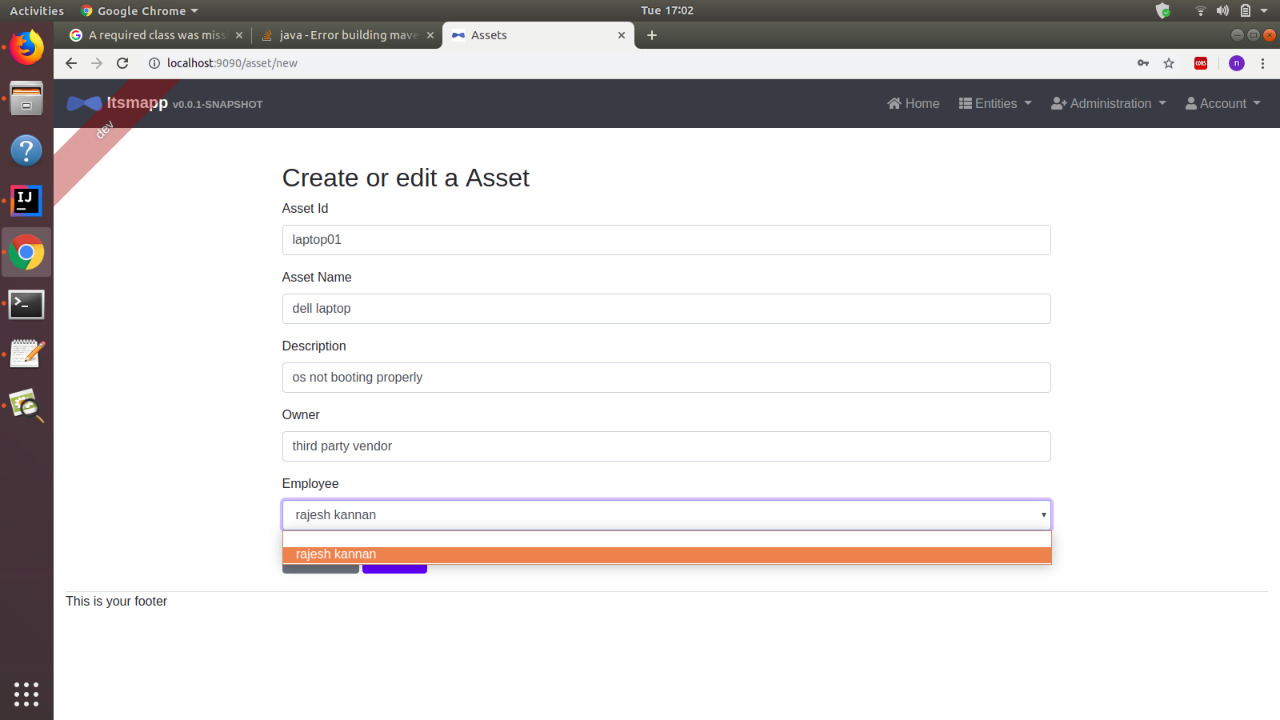
Asset has been created for which assigned to employee is coming as drop down list which can be tagged to employee.
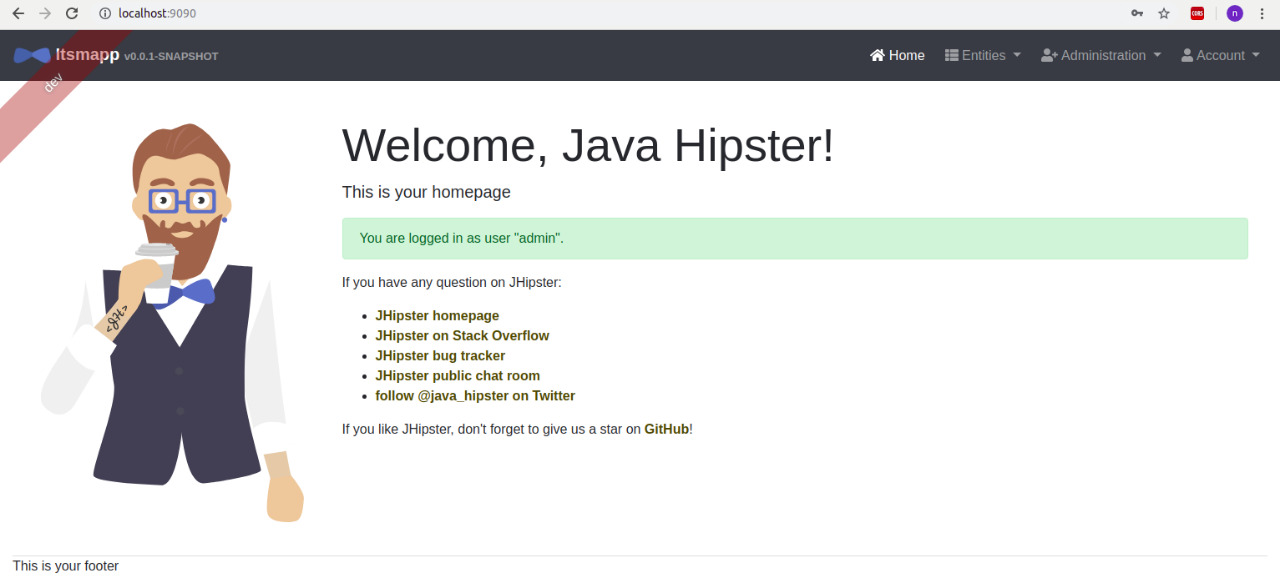
Now to remove the ribbon showing the dev profile, just remove the tag from this file (main.component.html).
<jhi-page-ribbon></jhi-page-ribbon>Added footer bar in the footerbar.component.html.
 <div class="footer">
    <nav class="navbar navbar-dark">
       <p class="text-center full-width">@CopyRight 2019-2020</p>
    </nav>
</div>
Then do build the frontend-components, which will rebuild and replace the frontend components without stopping the server. Screen will look like as shown below.