Setting Up Flutter Development Environment

Setting up a Flutter development environment involves installing Flutter and Dart, configuring your system, and choosing an IDE (Integrated Development Environment). Here are the steps to set up a Flutter development environment:
Windows
Setting up your development environment for Flutter in Visual Studio Code (VS Code) on Windows involves several steps. Here's a step-by-step guide:
1. System Requirements:
- Operating System: Windows 7 or newer (64-bit)
- Disk Space: 400 MB (for Flutter SDK and Dart SDK)
- Tools: Git for Windows
2. Install Visual Studio Code:
Download and install Visual Studio Code
3. Install Dart SDK:
Flutter uses the Dart programming language, so you need to install the Dart SDK. Follow these steps:
- Download the Dart SDK
- Extract the downloaded ZIP file to a location on your computer.
- Add the Dart SDK bin directory to your system PATH:
- Right-click on This PC or My Computer and select Properties.
- Click on "Advanced system settings" on the left.
- Click on the "Environment Variables" button.
- Under "System variables," find and select the "Path" variable, then click "Edit."
- Click "New" and add the path to the bin directory of the Dart SDK (e.g., C:\dart-sdk\bin).
4. Install Flutter:
- Download the Flutter SDK
- Extract the downloaded ZIP file to a location on your computer.
- Add the Flutter bin directory to your system PATH:
Follow the same steps as for Dart SDK, but this time add the path to the bin directory of the Flutter SDK (e.g., C:\flutter\bin).
5. Verify Flutter Installation:
- Open a new terminal in VS Code (View -> Terminal or Ctrl+ `).
- Run the following command to check if Flutter is installed correctly:
This should display information about the Flutter version and Dart version.
flutter --version
6. Install Android Studio (Optional, for Android development):
- Download and install Android Studio.
- Follow the setup wizard to install the Android Studio IDE.
- Open Android Studio, go to the "Configure" menu, and select "SDK Manager." Install the necessary SDKs and tools.
7. Create a Flutter project
- Open a new terminal in VS Code.
- Run the following command to create a new Flutter project:
flutter create my_flutter_projectReplace "my_flutter_project" with the desired project name.
8. Run the Flutter App:
Navigate to the project directory:
cd my_flutter_projectRun the app on an emulator or connected device:
flutter runThis should launch your Flutter app on the emulator or connected device.
Now, You have successfully set up your Flutter development environment in Visual Studio Code on Windows. You can start building and running Flutter applications.
MacOS
Setting up a Flutter development environment on macOS involves several steps. Below is a step-by-step guide to help you set up Flutter on your Mac:
1. Install Xcode:
Flutter relies on Xcode for iOS development. You can install Xcode from the Mac App Store. After installation, open Xcode and accept the license agreement.
2. Install Homebrew (if not already installed):
Open Terminal and run the following command to install Homebrew:
/bin/bash -c "$(curl -fsSL https://raw.githubusercontent.com/Homebrew/install/HEAD/install.sh)"
3. Install Git (if not already installed):
Use Homebrew to install Git:
brew install git
4. Install Flutter:
- Download the Flutter SDK
- Extract the downloaded ZIP file and move the flutter directory to your desired location (e.g., /Users/your-username/flutter).
- Add the Flutter binary directory to your system PATH. Open your shell profile file (usually ~/.zshrc for zsh or ~/.bash_profile for bash) and add the following line:
export PATH= "$PATH: `<path-to-flutter-directory>`/flutter /bin"Replace <path-to-flutter-directory> with the actual path where you placed the Flutter directory.
Run the following command to apply the changes:
source ~/ .zshrc # for zshOr
source ~/.bash_profile # for bash
5. Install Dart SDK
Flutter also requires the Dart SDK. You can download it from the Dart SDK website
6. Install Android Studio:
Flutter also requires Android Studio for Android development. Download and install Android Studio from the official website: Android Studio
7. Configure Android Studio:
- Open Android Studio and install the Flutter and Dart plugins from the marketplace.
- Restart Android Studio after installing the plugins.
- Open the Flutter settings in Android Studio and set the Flutter SDK path to the location where you installed Flutter.
8. Verify Installation:
Open a new Terminal window and run the following command to verify your installation:
flutter doctorThis command checks your system for dependencies and guides any missing components.
That's it! You should now have a working Flutter development environment on your macOS.
Setting Up an Android Device or Emulator for Flutter App Development
Setting up an Android device or emulator to run Flutter involves a few steps. Here's a guide on how to set up both an Android device and an emulator:
Setting up an Android Device:
1. Enable Developer Options:
- On your Android device, go to "Settings."
- Scroll down and select "About phone" or "About tablet."
- Find the "Build number" entry and tap it seven times to enable Developer Options.
- Enter your device's PIN or password when prompted.
2. Enable USB Debugging:
In "Developer options," find and enable "USB debugging."
3. Connect your Device:
- Connect your Android device to your computer using a USB cable.
- You might be prompted to allow USB debugging on your device. Allow it.
4. Verify Connection:
- Open a terminal in VS Code.
- Run the following command to ensure that Flutter recognizes your device:
flutter devicesYour connected device should be listed.
Setting up an Android Emulator:
1. Install Android Studio:
If you haven't already, install Android Studio as mentioned in the previous response.
2. Open AVD Manager:
- Open Android Studio.
- Click on "Configure" in the welcome screen and select "AVD Manager."
3. Create a Virtual Device:
- Click on "Create Virtual Device."
- Choose a hardware profile (e.g., Pixel 3).
- Click "Next."
4. Select a System Image:
- Download and select a system image for the virtual device. Make sure to download an image with Google Play if you need Google services.
- Click "Next" and follow the on-screen instructions to complete the setup.
5. Start the Emulator:
In AVD Manager, click on the green "Play" button next to the created virtual device.
6. Verify Emulator in Flutter:
- Open a terminal in VS Code.
- Run the following command to ensure that Flutter recognizes your emulator:
flutter devicesYour emulator should be listed.
Running Flutter App on Device or Emulator:
1. Navigate to Your Flutter Project:
- Open a terminal in VS Code.
- Navigate to your Flutter project directory:
cd path/to/your/flutter/project
2. Run the App:
Run the following command to build and launch your Flutter app on the connected device or emulator:
flutter runYour app should now run on the specified device.
Now, you have successfully set up an Android device or emulator to run Flutter. You can use either option for testing and developing your Flutter applications.
Version Control and Introduction to Git
Version control is a crucial aspect of software development that allows developers to track changes to their code over time. Git is a popular distributed version control system that is widely used in the software development community. It is particularly well-suited for collaborative projects and helps manage codebase history effectively.
Here's a brief introduction to version control concepts and how to use Git in a Flutter project:
Version Control Concepts:
Repository (Repo): A repository is a collection of files and version control information stored in a specific directory.
Commit: A commit is a snapshot of changes made to the code at a specific point in time. It includes information about what changes were made and who made them.
Branch: A branch is a separate line of development. Developers can create branches to work on features or bug fixes without affecting the main codebase.
Merge: Merging is the process of combining changes from one branch into another.
Using Git in Flutter:
1. Initialize a Git Repository:
- Open a terminal in your Flutter project directory.
- Run the following command to initialize a Git repository:
git init
2. Create a .gitignore File:
- Create a file named .gitignore in your project's root directory.
- Add entries for files and directories that you want Git to ignore (e.g., build artefacts, temporary files).
File.`gitignore`:
# Flutter/Dart-specific
.dart_tool/
.flutter-plugins
.flutter-plugins-dependencies
build/
Add and Commit Changes:
Use the following commands to stage and commit your changes:
git add .
git commit -m "Initial commit"
Branching:
Create a new branch for a feature or bug fix:
git branch feature-branch
Switch to the new branch:
git checkout feature-branchMake your changes and commit them.
Merging:
Switch back to the main branch:
git checkout mainMerge changes from the feature branch:
git merge feature-branch
Remote Repository (Optional):
Host your code on a remote repository service like GitHub, GitLab, or Bitbucket for collaboration and backup.
git remote add origin <repository_url>
git push -u origin main
Replace <repository_url> with the URL of your remote repository.
Creating Your First Flutter Project
Install Flutter:
- Download and install Flutter from the official Flutter website.
- Follow the instructions for your operating system.
Set Up Flutter:
- After installation, add the Flutter bin directory to your system's PATH variable.
- Open a terminal and run flutter doctor to check for any dependencies or issues. Follow the instructions to resolve them.
Create a Flutter Project:
Open a terminal and run the following command to create a new Flutter project:
flutter create hello_world
Navigate to the Project:
Move to the project directory using the following command:
cd hello_world
Open the Project in an IDE:
Open the project in your preferred IDE or code editor. Popular choices include Visual Studio Code, IntelliJ IDEA, and Android Studio.
Modify lib/main. dart:
Open the lib/main. dart file in your editor and replace its contents with a simple "Hello World" program. Here's an example:
import 'package: flutter/material.dart';

void main() {
 runApp(MyApp());
}

class MyApp extends StatelessWidget {
 @override
 Widget build(BuildContext context) {
   return MaterialApp(
     home: Scaffold(
       appBar: AppBar(
         title: Text('Hello World'),
       ),
       body: Center(
         child: Text('Hello, Flutter!'),
       ),
     ),
   );
 }
}
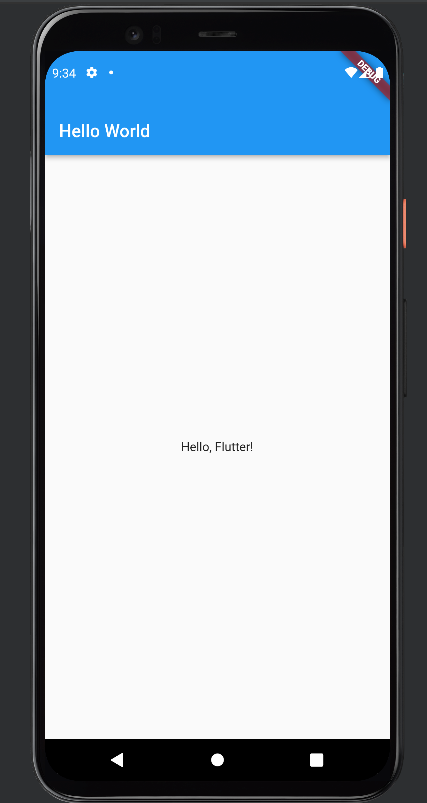
Run the App:
- Ensure you have an emulator or a physical device connected.
- Run the app using the following command:
flutter runThis command will launch your app on the connected device or emulator.
Conclusion
In conclusion, setting up environment variables is crucial for securing sensitive information in your blog's codebase, while mastering basic Git commands ensures efficient version control. Together, they empower you to manage and deploy your blog with ease, fostering a streamlined development process.
Stay tuned for my upcoming article where I delve into the world of Dart, exploring its nuances and capabilities more insightful.